从0开玩lichee zero-5-mmc烧录

一般比较小的系统我们用spi flash。 比较大的系统比如debian,我们需要mmc sd卡。

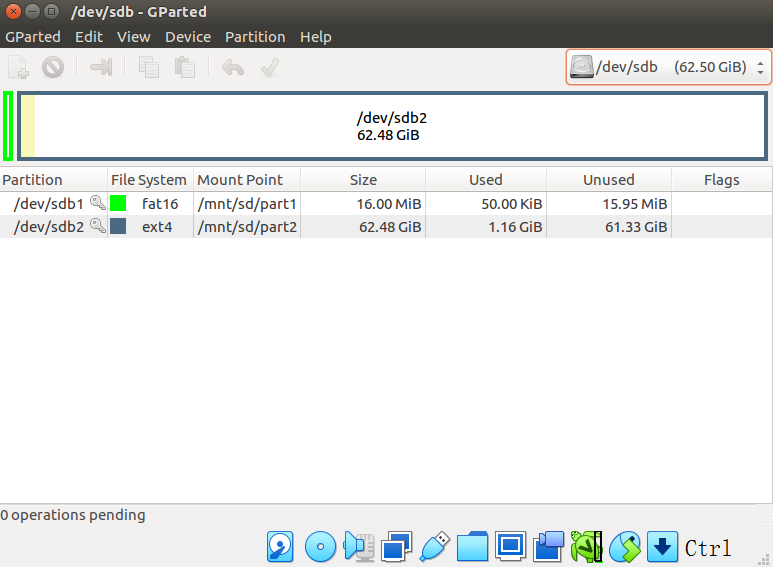
分区

file

准备

将所需的所有目标文件,都拷贝到当前目录下。

uboot

dd if=u-boot-sunxi-with-spl.bin of=/dev/sdb bs=1024 seek=8

第一分区

cp boot.scr /mnt/sd/part1
cp sun8i-v3s-licheepi-zero-dock.dtb /mnt/sd/part1/
cp zImage /mnt/sd/part1

第二分区

tar vxf rootfs.tar -C /mnt/sd/part2

从0开玩lichee zero-3-rootfs编译

build

apt-get install linux-headers-$(uname -r)
wget https://buildroot.org/downloads/buildroot-2017.08.tar.gz
tar xvf buildroot-2017.08.tar.gz
cd buildroot-2017.08/
make menuconfig
make

troubleshoot

  • host-m4 版本问题:c-stack.c:55:26: error: missing binary operator before token "("
    解决: 由m4-1.4.18升级为m4-1.4.19。修改package/m4下的m4.mk和m4.hash
    m4.mk:

    M4_VERSION = 1.4.19

    m4.hash:

    sha256  63aede5c6d33b6d9b13511cd0be2cac046f2e70fd0a07aa9573a04a82783af96  m4-1.4.19.tar.xz
  • bison: Please port gnulib fseterr.c to your platform
    解决:cd output/build/host-bison-3.0.4

    sed -i 's/IO_ftrylockfile/IO_EOF_SEEN/' lib/*.c
    echo "#define _IO_IN_BACKUP 0x100" >> lib/stdio-impl.h
  • libfakeroot.c:99:40: error: '_STAT_VER' undeclared
    #ifndef _STAT_VER
    #if defined (__aarch64__)
    #define _STAT_VER 0
    #elif defined (__x86_64__)
    #define _STAT_VER 1
    #else
    #define _STAT_VER 3
    #endif
    #endif

从0开玩lichee zero-2-kernel编译

系统

为了支持 rtl8723 我们需要新较新的分支:
git clone https://github.com/Lichee-Pi/linux.git
git checkout -b nano-5.2-flash origin/nano-5.2-flash

cd linux
make ARCH=arm licheepi_zero_defconfig
make ARCH=arm menuconfig   #add bluethooth, etc.
make ARCH=arm CROSS_COMPILE=arm-linux-gnueabihf- -j16
make ARCH=arm CROSS_COMPILE=arm-linux-gnueabihf- -j16 INSTALL_MOD_PATH=out modules
make ARCH=arm CROSS_COMPILE=arm-linux-gnueabihf- -j16 INSTALL_MOD_PATH=out modules_install

支持 rtl8723BS

make menuconfig => Device Drivers => Staging drivers
选择rtl8723BS 为 M

troubleshoot

  • multiple definition of `yylloc'; scripts/dtc/dtc-lexer.lex.o:(.bss+0x0): first defined here
    解决:vi ./scripts/dtc/dtc-parser.tab.c ,将YYLTYPE yylloc这一行注释掉

  • scripts/extract-cert.c:21:10: fatal error: openssl/bio.h: No such file or directory
    解决:sudo apt install openssl libssl-dev

  • libz.so.1
    解决:apt-get install lib32z1

  • 其他指令问题 ,比如 "cpsid i","isb" 等
    解决:更换编译器,比如:
    https://releases.linaro.org/components/toolchain/binaries/
    https://releases.linaro.org/components/toolchain/binaries/latest-7/arm-linux-gnueabihf/gcc-linaro-7.5.0-2019.12-i686_arm-linux-gnueabihf.tar.xz

lichee zero如何进入fel模式

当我们烧录了uboot后,系统默认不会再进入fel模式,这样我们就想反复更新uboot或者其他分区,那么

如何进入fel模式?

Zero有一个usb下载模式称为fel模式,进入fel模式有下面几种方式:

  • TF卡和spi flash 同时没有可启动镜像;
    也就是说你不插卡,且焊接的是新的或者没有有效镜像的spi flash,那就上电自动进入fel下载模式
  • TF卡中有进入fel模式的特殊固件 fel-sdboot.sunxi
    如果你的spiflash已经有了启动镜像,那么需要在TF卡中烧入一个sunxi提供的 启动工具 ( dd if=fel-sdboot.sunxi of=/dev/mmcblk0 bs=1024 seek=8 ), 那么插入该TF卡启动会进入fel模式;
  • 上电时SPI_MISO拉低到地
    该引脚为boot引脚,上电时出于低电平即会进入fel下载模式。

关于windows下如何写入fel-sdboot.sunxi,可以参看 https://goodmemory.cc/use-dd-cmd-in-windows/

从0开玩lichee zero-1-uboot篇

·## 准备工作
sudo apt-get install gcc-arm-linux-gnueabihf
sudo apt-get install git
sudo apt-get install Python2

uboot

git clone https://github.com/Lichee-Pi/u-boot.git -b v3s-current

config SD TF

修改u-boot/include/configs/sun8i.h文件 加入:

#define CONFIG_BOOTCOMMAND   "setenv bootm_boot_mode sec; " \
                            "load mmc 0:1 0x41000000 zImage; "  \
                            "load mmc 0:1 0x41800000 sun8i-v3s-licheepi-zero.dtb; " \
                            "bootz 0x41000000 - 0x41800000;"

#define CONFIG_BOOTARGS      "console=ttyS0,115200 panic=5 rootwait root=/dev/mmcblk0p2 earlyprintk rw  vt.global_cursor_default=0"

config spi flash

git clone -b v3s-spi-experimental https://github.com/Lichee-Pi/u-boot.git

配置Flash支持型号

执行 make ARCH=arm menuconfig 打开uboot菜单配置,进入到 Device Drivers ‣ SPI Flash Support

注意看一下自己flash的厂家名称,例如选上Macronix SPI flash support用来支持测试用的flash:MX25L25645G。

如果使用的是16MB以上的flash,需要勾选flash bank支持选项,否则最多只能读到16MB: CONFIG_SPI_FLASH_BAR

spi 分区

这里 使用 MX25L25645G, 32M SPI flash 作为启动介质,规划分区如下:

分区序号 分区大小 分区作用 地址空间及分区名
mtd0 1MB spl+uboot 0x0000000-0x0100000 : "uboot"
mtd1 64KB dtb文件 0x0100000-0x0110000: "dtb"
mtd2 4MB linux内核 0x0110000-0x0510000 : "kernel"
mtd3 剩余 根文件系统 0x0510000-0x2000000 : "rootfs"
 #define CONFIG_BOOTCOMMAND   "sf probe 0; "                           \
                             "sf read 0x41800000 0x100000 0x10000; "  \
                             "sf read 0x41000000 0x110000 0x400000; " \
                             "bootz 0x41000000 - 0x41800000"

 #define CONFIG_BOOTARGS      "console=ttyS0,115200 earlyprintk panic=5 rootwait " \
                             "mtdparts=spi32766.0:1M(uboot)ro,64k(dtb)ro,4M(kernel)ro,-(rootfs) root=31:03 rw rootfstype=jffs2"

make

ARCH=arm CROSS_COMPILE=arm-linux-gnueabihf- make LicheePi_Zero_defconfig
ARCH=arm make menuconfig
ARCH=arm CROSS_COMPILE=arm-linux-gnueabihf- make

编译完成后,在当前目录下生成了u-boot-sunxi-with-spl.bin,可以烧录到TF卡8K偏移处启动

注意:对于大于16M的flash,需要在menuconfig中开 CONFIG_SPI_FLASH_BAR

烧录

sd

sudo dd if=u-boot-sunxi-with-spl.bin of=/dev/sdb bs=1024 seek=8

troubleshoot

  1. <command-line>: fatal error: curses.h: No such file or directory
    解决:sudo apt-get install libncurses5-dev libncursesw5-dev

  2. Your dtc is too old, please upgrade to dtc 1.4 or newer
    解决:apt-get install device-tree-compiler

reg :https://licheezero.readthedocs.io/zh/latest/%E7%B3%BB%E7%BB%9F%E5%BC%80%E5%8F%91/SPI_flash_build.html#uboot
从0开玩lichee zero-0-固件体验

lichee zero介绍

https://licheezero.readthedocs.io/
https://wiki.sipeed.com/soft/Lichee/zh/Zero-Doc/

固件测试

因为购买时sd和板子是分开购买的,不像其他的开发板,到手就用,这个要自己烧录才能体验到板子的基本功能。 ### 固件下载 可以参考上面的这个https://wiki.sipeed.com/soft/Lichee/zh/Zero-Doc/System_Development/download_onekey.html

可能采坑的地方是对于新手,这个文档没有说清楚,下载的细节。需要解压后下载dd文件,如果你是直接下载,就会发现板子没有反应,不知所措。

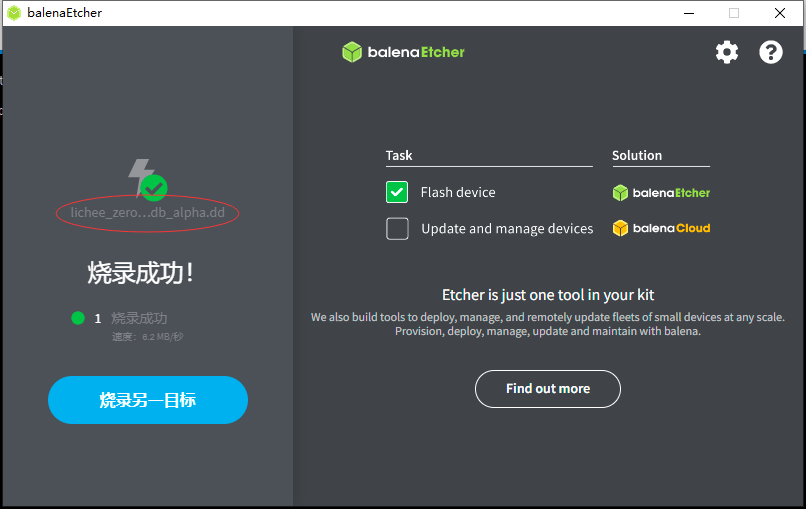
这里我自己使用的是:lichee_zero-mindb_alpha.dd:

file

串口日志

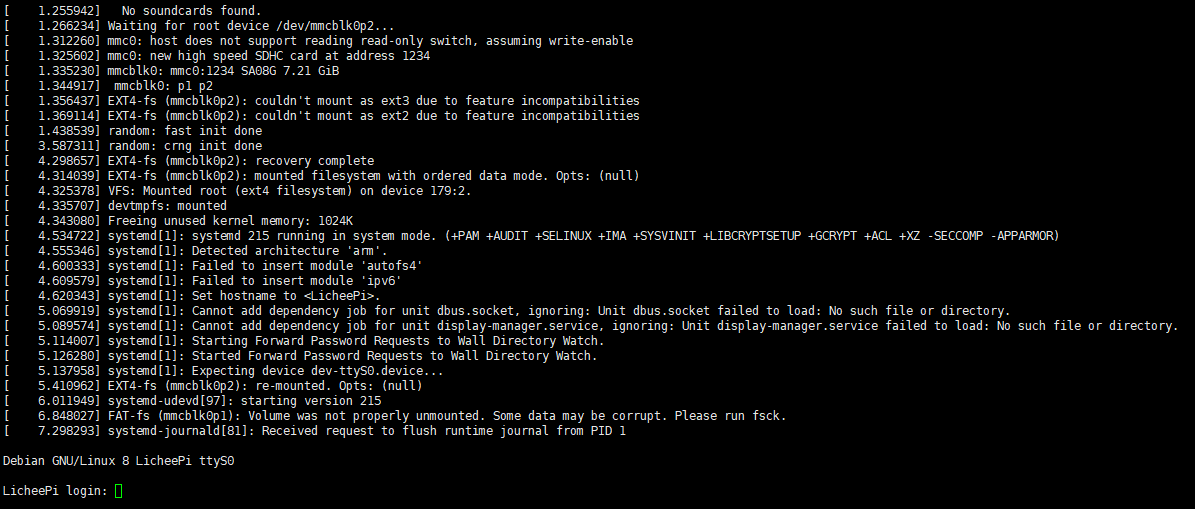
按照官方指导,连接uart0,就能看到系统的开机日志:
file

账号密码

网上文档说的是root licheepi,实际验证不对。
经多方验证,有以下几种密码组合:

  1. root toortoor
  2. root licheepi
  3. root 空