github: https://github.com/hiproz/aosp-server-toolkit
背景
之前是用orange pi做家庭远程伺服跳板机的,平时开vnc或者ssh之类。发现老是死机,于是萌生了用二手手机做服务器的想法。
网上小黄鱼有很多二手手机,价格比开发板还便宜,而且配置更高,硬件的一致性也更好。
pixel3 手机 & aosp
因为google的pixel手机对应的代码基线都是开源的,所以选择便宜的pixel手机。代码直接从aosp的官网获取。
目前pixel3的价格在100-200 比开发板是很高性价比了,所以我们选择pixel3手机作为入门。
aosp系统固件构建,一般主要是做跟服务器相关的特性修改,比如充电自动开机,集成各种工具,比如vnc,busybox等等。具体的编译和集成方法根据不同版本各有差异,需要自己从网上获取验证。
简介
为了将pixel手机变成一台通用linux服务器,用来实现远程控制监控家庭和公司网络的目的。我们基于aosp源码,添加必要的工具集,并给出相关的软件配置操作流程等。
这里的固件和工具,当前通过pixel3验证,但理论上只要适合aosp对应版本的手机,就都能使用,只是我们不一定都一一验证,需要用户自行验证,有问题欢迎反馈。
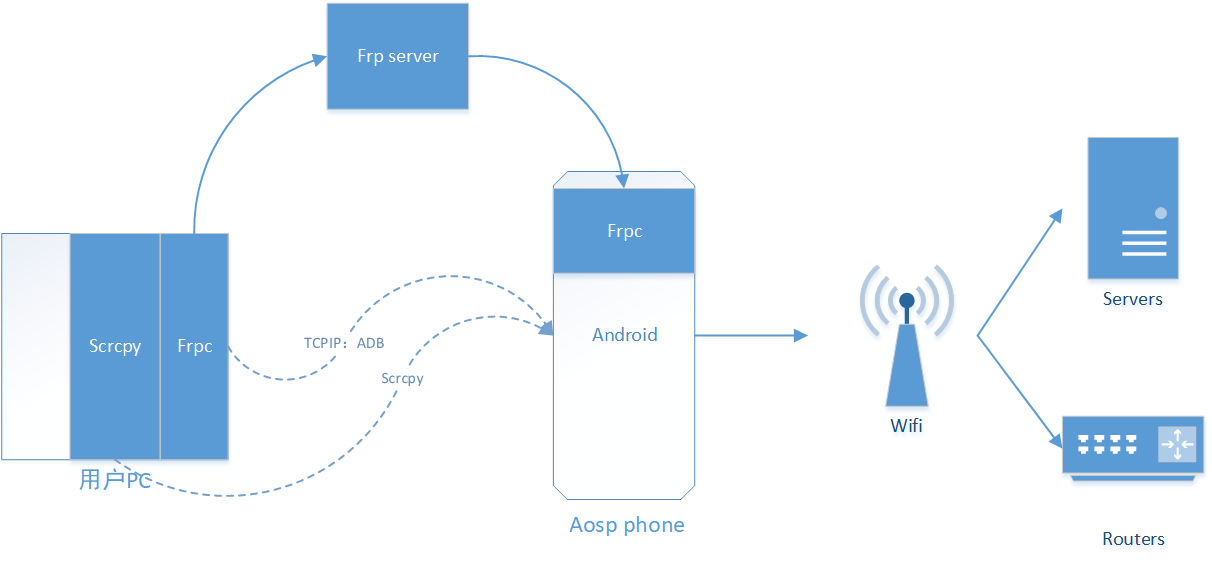
系统架构
我们方案的一些基本核心功能:
- 上电自动开机
- 实现vnc远程效果,采用frp+scrcpy
- 远程shell操作,我们使用的基于tcpip的 adb shell
使用步骤
- 下载对应编译好的aosp固件
- 烧录固件到手机,并手动配置手机wifi网络,确保手机能联网
- 首次配置:通过adb进行必要的frpc配置
- 远程登录手机,进行操作
- 恭喜你,你已经拥有了一台 arm64的带有屏幕的低功耗linux服务器了
烧录
使用安卓adb,fastboot工具链来进行烧录。
windows
windows adb tools
adb version:Version 31.0.3-7562133
fastboot verison:fastboot version 31.0.3-7562133
烧录步骤
- 解锁你的安卓手机,保证你能正常使用fastboot,解锁方法请根据你的手机型号和版本自行google
- 下载合适的固件压缩包,解压
- 启动cmd,cd到解压的目录内
- 设置环境变量 set ANDROID_PRODUCT_OUT=your 解压目录
- adb reboot bootloader
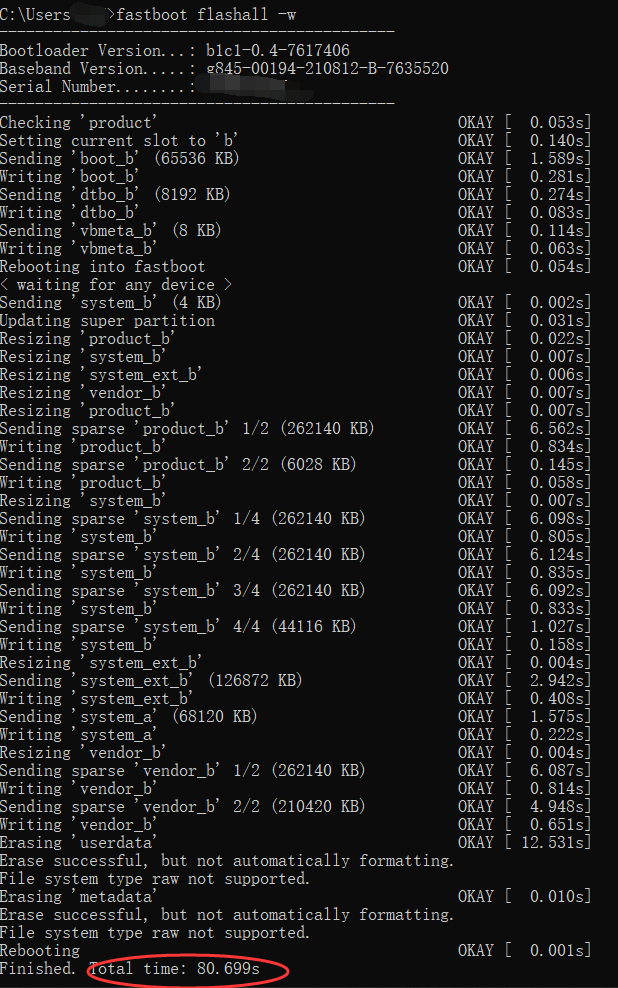
- fastboot flashall -w
- 烧录完成提示如下
mac
mac adb tools
【待补充】
烧录步骤
和windows的基本一致,不一致的是设置环境变量的命令不同。
*不同之处待更新**【待补充】*
首次使用
我们的系统是debug版本,所以支持root和remount。首次使用时,我们需要配置frpc相关的服务,保证我们以后可以远程操作手机。
1. 首次remount
为了对手机进行各种文件操作,我们建议默认remount。
adb root
adb remount
# 这里可能提示重启,请进行必要的重启
adb reboot
2. frpc 配置
我们主要是通过frpc 来实现远程scrcpy和adb shell,所以你需要部署一台frp服务器。可以从网上买一个最小配置的vps。
frps 服务器
你需要一台有公网ip的服务器,部署frp服务器,具体可以去frpc官网下载,因为我们手机端集成的是v0.58.0。所以我们建议服务器端和电脑客户端,也下载对应的版本。我们假设服务器开启token安全机制,参考配置如下:
bindPort = 7000
auth.method = "token"
auth.token = "123"
usb adb连接手机,修改frpc配置
adb root
adb remount
adb shell
busybox vi /data/frpc.toml
frpc.toml 参考内容如下:
serverAddr = "1.1.1.1" # only support ip, do not use domain
serverPort = 7000
auth.method = "token"
auth.token = "000000"

[[proxies]]
name = "secret_proxy"
type = "stcp"
secretKey = "key"
localIP = "127.0.0.1"
localPort = 5555
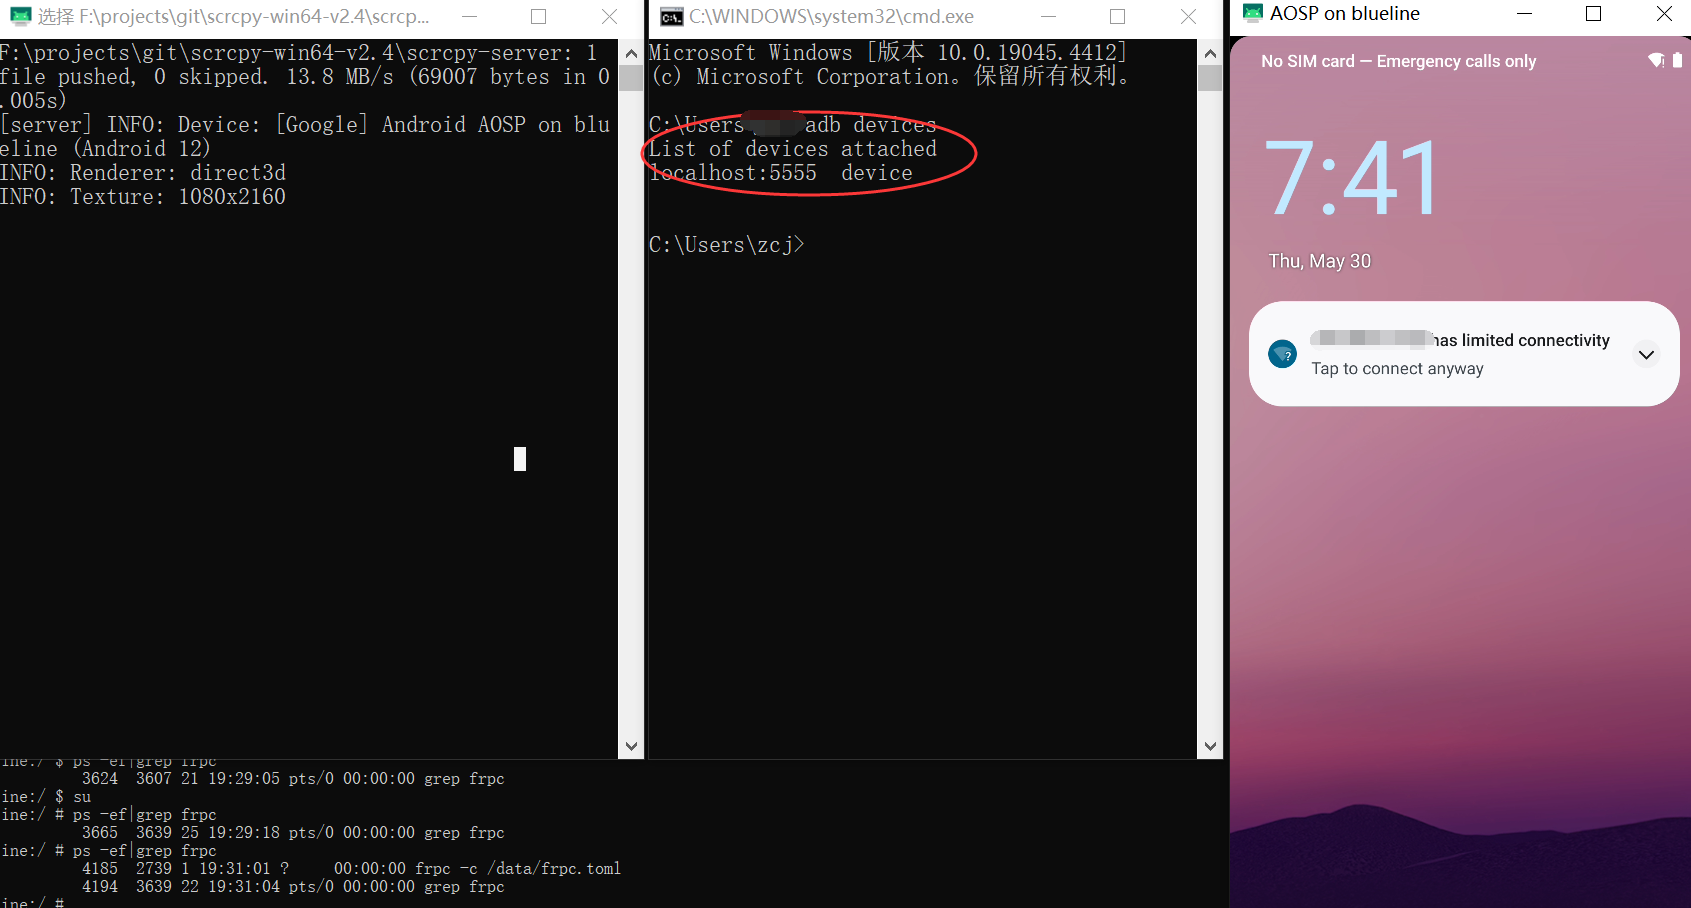
请根据你自己服务器的实际参数,修改以上参数,修改后adb reboot手机,重新进去adb shell 确认frpc是否正确取运行,如果能正确看到frpc进程信息,就初步确认frp运行起来了:
blueline:/ # ps -ef|grep frpc
root     4185  2739 1 19:31:01 ?     00:00:00 frpc -c /data/frpc.toml
root     4194  3639 22 19:31:04 pts/0 00:00:00 grep frpc
远程连接手机
参看我们前面技术架构,在我们通过自己的电脑远程访问时,我们先要在本地把电脑上的frpc跑起来。
1. 配置本地frpc
serverAddr = "1.1.1.1"
serverPort = 7000
auth.method = "token"
auth.token = "123"

[[visitors]]
name = "secret_visitor"
type = "stcp"
serverName = "secret_proxy"
secretKey = "key"
bindAddr = "127.0.0.1"
bindPort = 5555
在配置完frpc后,我们基本就可以拔掉usb,完全像远程服务器一样来访问手机了。这里我们假设你的frps 和frpc都配置正确。如果你有这方面的错误,请检查网络以及端口防火墙等基本网络参数。
2. 设置tcpip adb,建立远程adb链路
adb connect localhost:5555
connected to localhost:5555
3. 像在本地通过usb连接手机一样,启动scrcpy
4. 如果想使用shell, 你可以使用adb shell,感觉就跟usb 连接一样
adb shell
ssh
我们的固件集成了ssh客户端,当我们需要将手机作为跳板服务器或者堡垒机服务器通过ssh访问别的ssh服务器器时,我们就可以使用手机中的ssh来完成
vi
你可以使用 busybox vi
其他工具?
待补充
本地下载
- https://cdn.itranscloud.com/aosp/aosp_blueline-userdebug_12_SP1A.210812.016.A1.7z
- https://cdn.itranscloud.com/aosp/aosp_blueline-userdebug_12_SP1A.210812.016.A1_v101.7z